Table of Content
These can help keep rear channel speaker wires out of the way by securing them to your wall’s molding. Home theater installation companies put in a speaker or movie player is that they’ll do the job right instead of doing the job haphazardly. By taking the time to wire your equipment properly, you can cut down on the number of wires and cables needed. Therefore, there’s less risk that you’ll have a jumbled mess in your living room or movie room. When a professional installs your home theater system, he or she can keep cables in check by securing them with zip ties.

Did you know many cable dealers allow an at-home trial period for the brands they carry? Then you can see if the expensive brands are really worth the money. If you don't hear or see a difference, try to keep your costs down by buying less expensive cables. Wires running to rear speakers should be secured so you won't step on them or trip over them. Be sure to match the shape and the size of the clamp to the cable.
Kelink 48Gbps Ultra High Speed Black Braided 8K HDMI 2.1 Cable 3.3FT
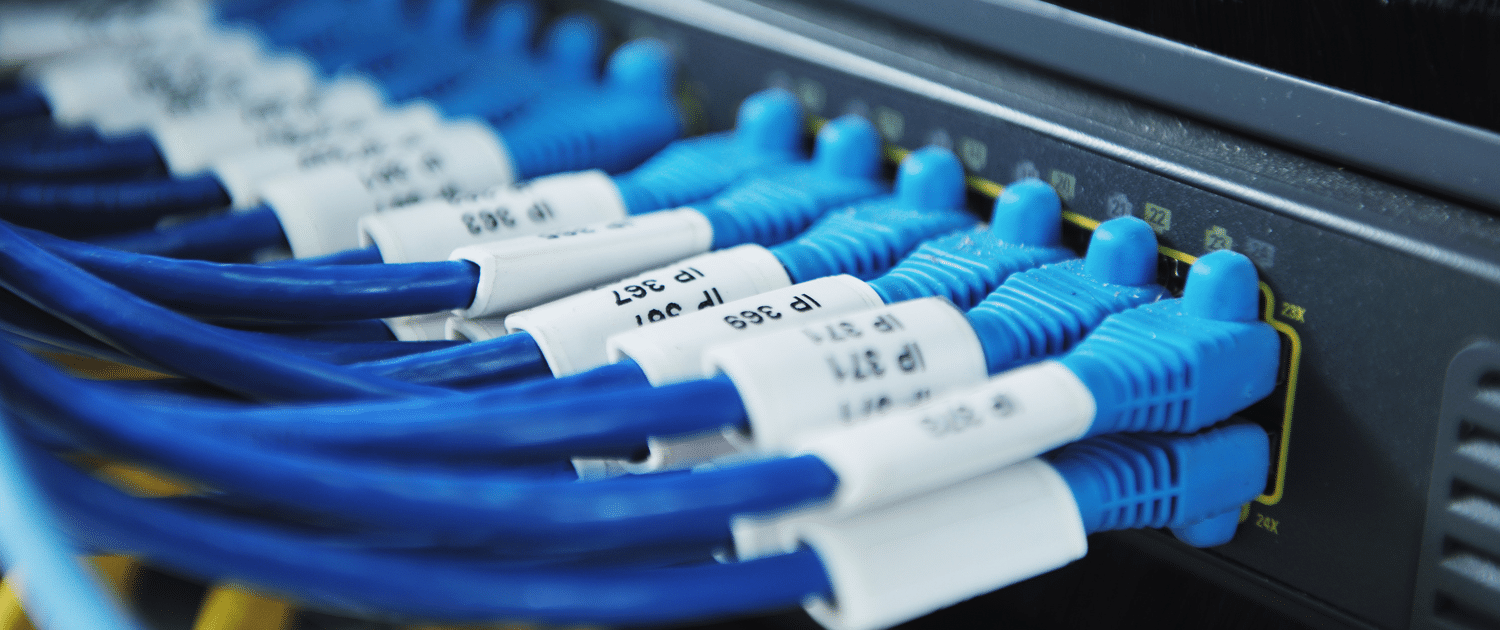
Labeling or using another system of organizing wires and cables can keep you safe while enjoying your home theater equipment. This is because the wires need to be a certain length and thickness to meet safety standards. Whoever installs your home theater system will likely use 16-gauge wire to do so. However, certain types of speakers require thicker wires to avoid fraying or other problems.
A good tip is to color-code your labels by cable type, or at least make sure your labeling is consistent so that you or anyone else can easily decode what connects where. You will also need to invest in a well-designed power surge protector and use one power outlet per wall. The power strip should have enough outlets to handle your home theater components comfortably.
Use wire ties to bundle cables
If wires don’t need to be run inside the walls, raceways can be used. Raceways are plastic channels or pathways that will hide and protect the cables. PCMag.com is a leading authority on technology, delivering lab-based, independent reviews of the latest products and services. Our expert industry analysis and practical solutions help you make better buying decisions and get more from technology. Depending on your home theater setup, get an appropriate box, basket, or drawer. If you don't mind having a bit of fuzziness on the undersides of your remotes, you can use Velcro strips with double-sided adhesive to keep your remotes in place.
I once went behind a piece of home theater furniture for a friend and found that he had connected every single audio output for his Blu-ray player to his AV receiver. While it may be true that you could need an analogue audio feed for a second Zone, he had analogue audio, digital audio as well as component video and HDMI. That’s 8 cables coming out the back of this simple Blu-ray player. I removed everything but the HDMI (he didn’t run a second zone), and the cables were considerably easier to organize. You can use wire ties or zip ties to bundle the cables together but do not crunch them too tightly as this can damage the insulation.
Secure loose wires running to rear surround speakers
In equal volume mode, we've made the loudness of each speaker about the same. This gives you a more direct comparison of subtle voicing differences between speakers. Our advisors cannot see anything that is on your computer. They only have the ability to "serve" a page from our site and put items in your cart. You’re in control at all times, and you can disconnect at any time by closing your browser window.
In an actual listening room, you'd find that some speakers play louder than others when fed the same amount of power. In equal power mode, you'll hear these differences in loudness as they naturally occur between speakers. Running wires under carpeting isn’t recommended — especially in high traffic areas. If the wires are continually stepped on, over time their insulation can get rubbed away. It’s best to run rear channel wires along the baseboard. Crutchfield’s color-codedCableLabels are a great solution.
The Ultimate Cable Organization Guide – Sewell Direct
Keep power cords away from signal cords because they can introduce interference into the signal. Understand that you are connecting components together to produce a logical flow of signals. This means left always connects to left; right always connects to right; positive always to positive; negative always to negative; and inputs are always connected to outputs. SpeakerCompare tailors your listening experience to the exact headphones you have, so that what you hear is comparable to auditioning speakers side-by-side in person.
Flat-panel TV, 5.1 surround sound, multi-room audio speaker system – the works. Make sure the cables are rated for 4K60 at the very least . Don't worry too much if they're a brand you don't recognize, because generally, most cables should work just fine.
You might have to buy some bits and bobs to rein everything in, but the accessories we mention here are pretty cheap. You will need to cut fitting holes for the grommets, install the grommets then run the cable from the top to the bottom. You can also repaint the cable concealer to match the color of your wall for a seamless blend. This will keep the HDMI cables running smoothly behind your TV in tight spaces. However, you may need to buy wires and cables that are longer than the intended length in case you need to do any modifications to your system.

Bundling cables together keeps your system from becoming a “spaghetti mess.” Also, adhesive pads can be used to attach the cables to the walls for a more clean appearance. But there also are many other excellent options as well to get your cable into neat bundles. Velcro ties, or a hook and loop system are easy to tie, remove and are completely reusable. Velcro also cuts easily to any length you need it to be. You don't need to break the bank on a power strip, but you should consider getting a recognizable brand with a good reputation. Not only will it likely be better made than a dollar store power strip, but it might come with an equipment guarantee.
And all of those devices had power as well as low voltage cabling that formulated a big mess of “goesintas” and “goesoutas” . Cable management was something to be noticed and controlled. Home theater cables can be a mess, but professionals have a variety of solutions to organize them. Cable organization means bundling your cables together whenever possible and running them around carefully guided paths instead of letting them dangle. Cable management accessories enable bundling without the need for tape, string, glue, or other craft supplies that might awkwardly bind everything.

So if you're a cord-cutter and use your media streamer to watch everything, you don't need to worry about other remotes. For a bundle of speaker wires, tie them together using wire ties then attach them to your walls’ moldings using adhesive pads or cable clamps. We all know how important the home theater sound system is to creating the perfect environment.
By allowing the installation professional to label the wires, there’s less of a chance that they’ll be used in the wrong place later. Further, I’ll jump my audio and video down to the bottom of the gear before running it horizontally. This gives me a nice clean path and avoids running cable overtop of connectors you may someday need.
It replaces all the factory-issued remotes that come with your technology and gives you the convenience of controlling them all with one device. However, not all wireless systems may be compatible with a universal remote control. Manufacturers know this and often provide a list of brand names and models which can be programmed. Remember to bundle power cables and A/V cables separately. That minimizes the chance that electromagnetic interference from power cables will degrade your system’s performance.


No comments:
Post a Comment